Showing posts with label crafts. Show all posts

Friday, July 2, 2010

Getting Ready For Work

So I should be getting ready for work. Reading, preparing lessons and other such things. I thought about it and actually started it. The thing is, as soon as I started, I got this overwhelming urge to craft like there is no tomorrow. Maybe that's just it - I feel like there is no tomorrow. Don't get me wrong, I am excited to be working again but working means no time for all these other things that I do. Perhaps I am just anxious and expecting the whole work situation to be more demanding than it will be. In any case, instead of working, I've been "playing" hard! In addition to spending hours finished the dolls for the teachers, I finished some other long overdue projects.

Meet C. This is the BFF doll that I promised the Girl. Instead of a dress, I decided to make her kind of a bubble jumper. I have plans to knit her a jacket/cardigan for cold, foggy days ahead.


Oh... she will probably need some shoes too. Here she is in the original hair style. The Girl's friend often wears a little braid on one side of her head. The doll's hair gets so crazy messy so easily that I end up just putting a pony tail on her most of the time. I have to work on making better doll hair. Any good tips?


The other thing I finished were these bags that I owe Mrs Turducken. If you are reading this, the bags are on their way. Will probably arrive mid July. Sorry they took so long.

Thursday, July 1, 2010

Girls

My Girl finished her first year of preschool and is being transferred to a different class starting July 1. I still remember filling out the four page application for her last year, fearing that we may not be accepted and she won't get an education.

On the very long application, one of the questions they asked is what I expect the school to do for my child. My answer was that I wished for the school to be an extension of my family. I wanted the teachers to be kind, loving and I wanted them to care for my girl as if she were their own. Basically, I wanted them to be me, only better and more patient. Tall order, right?

Well, I think they did it! The teachers at the school showed my Girl so much love and kindness in the past year that I am very touched and I feel compelled to do something nice for them. As a parting gift, I made each teacher a doll that resembles my Girl. I asked the Girl how each teacher is significant to her and I designed the girls based on her answers.

Meet the Girls


This is for Yeung Sin Saang. She is the Girl's Chinese teacher. She always bring flowers from her garden as little gifts for the Girl because she knows my Girl LOVES flowers. She also keeps saying the Girl makes her really really want grandchildren. :-)


This is for Cheung Sin Saang. She is the "breakfast teacher". She takes care of the Girl on the mornings that we get to the school early enough for breakfast. She's also the first teacher who gave the Boy some food when he gave her puppy dog looks. Since then, all the other teachers took to feeding him when they see him and in return, he shows them his dimply smiles and says, "ng goi sin saang", which makes them very happy!


This is for Ms Tracy, the main teacher. The Girl says that Ms Tracy teaches her to write and draw and is her favorite. The picture doesn't show it very well but I got the Girl to draw a mini picture of Ms Tracy on the pink paper as part of the doll


The is for Ms Lori. Ms Lori has a kitty cat and she shows pictures of her cat to the Girl sometimes, which the Girl loves. She takes care of the Girl when I am late to pick her up. She also always has little gifts for the Girl.


The little kitty on Ms Lori's doll was made out of paper clay and then painted. I think this was our favorite doll. The Girl and I both wanted to keep this doll and give Ms Lori something else. Some of my friends (well, I can only think of one victim, really) have had a taste of my "I got you a gift, but I love it so much I had to keep it for myself" move and they didn't appreciate it one bit. I have to admit, it's pretty scummy of me. So, I have decided to teach my daughter to be a better person than I was. We decided to give Ms Lori her doll and we'll make another one for ourselves. Here is a close up of the kitty.


This is for Ms Joanne. She is the office clerk / librarian. She also takes care of the Girl when I am late and she always encourages the Girl to read books.


The little book has a real story in it about a little princess who goes to school. I made up the story. It's basically a story that says "thank you" to all the Girl's teachers. Here, take a peek over the girl's shoulder.


Here are the girls again. They were so much fun to make that I think I will make many more. I used left over fabrics from various clothes I made for the Girl for the dresses. Most of the accessories were made out of paper clay and then painted and varnished. I really enjoyed combining so many crafts (paper, book binding, clay, painting, sewing, gluing, etc.) into one project. I have plans to make them for my shop, too. Stay tuned.

Tuesday, June 22, 2010

Paper Dolls

The kids saw me make the little paper figures for Hubby's cake and wanted to play with them. I didn't want them to ruin the cake toppers before I served the cake so I offered to make them another couple to play with. Meet Snow White and Prince Charming.


I modeled these guys, as well as the cake toppers after the kids and they love seeing themselves as toys. These royalties even have their own castle.


What a simple and fun toy.

Saturday, June 19, 2010

Embroidery Part 3

The idea for this project started a long time ago when I read this blog post. Last year, I bought this plain dress and thought I would embroider one of the Girl's art work onto the dress.


Well, her drawing was not very interesting last year. They were mostly blobs of colours then so I put the project on hold. Seeing her embroidery brought this project to the surface again. We started with a drawing that we both liked.


I helped her redraw the picture onto the dress with a fabric marker. Drawing on fabric is a little hard because the fabric shifts around so much. I had to help her quite a bit. I am not sure if you can see the outline here.


With that, I set to work. I love the red/aqua colour combination so I just went with an all red plan. The embroidery itself was very simple. Except for the eyes which were done in a satin stitch, everything was done with a back stitch.


Don't you think a simple design like this totally livens up the dress?


The Girl was very excited about her new dress. She wanted to take a picture with the inspiration of her drawing, Stripy Sammy.


The cutting of the dress is quite forgiving so I hope she gets a lot of wear out of this garment. The only thing is that the neck hole is strangely small and my kids have big heads. I may have to cut a slit and make it a v-neck dress down the road. We'll see.

Friday, June 18, 2010

Embroidery Part 2

Encouraged by her success and enthusiasm, our second project involved a "pattern". I drew a simple picture with short line segments resembling stitches on a piece of muslin and mounted that on a hoop. The Girl was instructed to start on one end of each of those little lines and finish on the other end. Here, a picture is worth a thousand words.

See those little lines, they were drawn with a Sharpie.


She was so happy and relaxed during the whole process. It cracks me up that she made up this little song to go with her handy work and I love seeing her kick her little feet.


After about half an hour or so, we ended up with this.


Was she ever proud of herself. Then she got all excited and wanted me to turn this into a picture of her. "This is a Girl and she needs long hair." Well, she hasn't quite figured out that long hair equals lots of stitches. After about 3 more stitches, she gave up. So we put it away and brought it back for short periods of time over the next two days. Finally, this was the finished product.


I messed with the colors a little bit to show of the stitching because the palette she chose was very pale. I drew the stitch lines, tied all the knot, threaded all the needles and fixed a few unintentional knots and she did the rest. If you look at the outer most blue hair, you'll see that she got confused and filled in the white space in between the dotted line instead of filling in the dotted line. I considered taking it out for her and have her redoing it but decided maybe it's part of the charm of her first embroidery project.

I have a few ideas as to what to do with this. We'll see if she has the stamina to finish a few more squares for me to assemble a quilt for her. Otherwise, I can sew this onto her clothes or make another bag for her with it. A girl can't have too many bags, right?

Thursday, June 17, 2010

Embroidery Part 1

I introduced the Girl to some hand sewing last week while she was stuck at home. For the first attempt, I had her sew on a piece of felt mounted on a small embroidery hoop. The goal was to get her to understand where the needle has to go in and where it comes out. I also had her put what she now calls her sewing pillow on her lap so she won't stab herself. I gave her complete artistic freedom. She chose the thread. She decided where the stitches went and she decided what to do with the final product.

"Oooooh... thread...."


"This looks like a good starting point."


"Hold on, I need to concentrate."


"Success! One stitch down..."


This video shows her goofy attempts as well as her first sewing injury.


The final product was what she described as "little flowers on the grass". We sewed the little piece of felt into a pillow for her new "pet kitty". Presenting Stripy Sammy Napping On The Grass.


So proud of her work!

Wednesday, June 16, 2010

Colorful Beads

I read about dyeing and making pasta beads a while back but never had time to try it out. The recipe is pretty simple. Just put some rubbing alcohol and food coloring in a container (we used small ziplock bags) and immerse raw pasta pieces until you get the color you like. We left ours overnight and the colors came out very vibrant and saturated.

The Boy watching paint "dry".


See the great colours? Oh and since you are so great at guessing which kid is which, see if you can guess whose hands are these. :-p


It's a great sorting activity which both kids love. Sometimes I wonder if my kids have OCD. They love counting and sorting.


Nicely sorted.


I fashioned a sort of needle and thread out of a toothpick, some tape and some elastic thread.


It was great that both kids were capable of threading these beads and were equal participants in this craft. Sometimes, the Girl does all the work and all the Boy gets to do is watch. Surprisingly, the Boy really enjoyed this one.


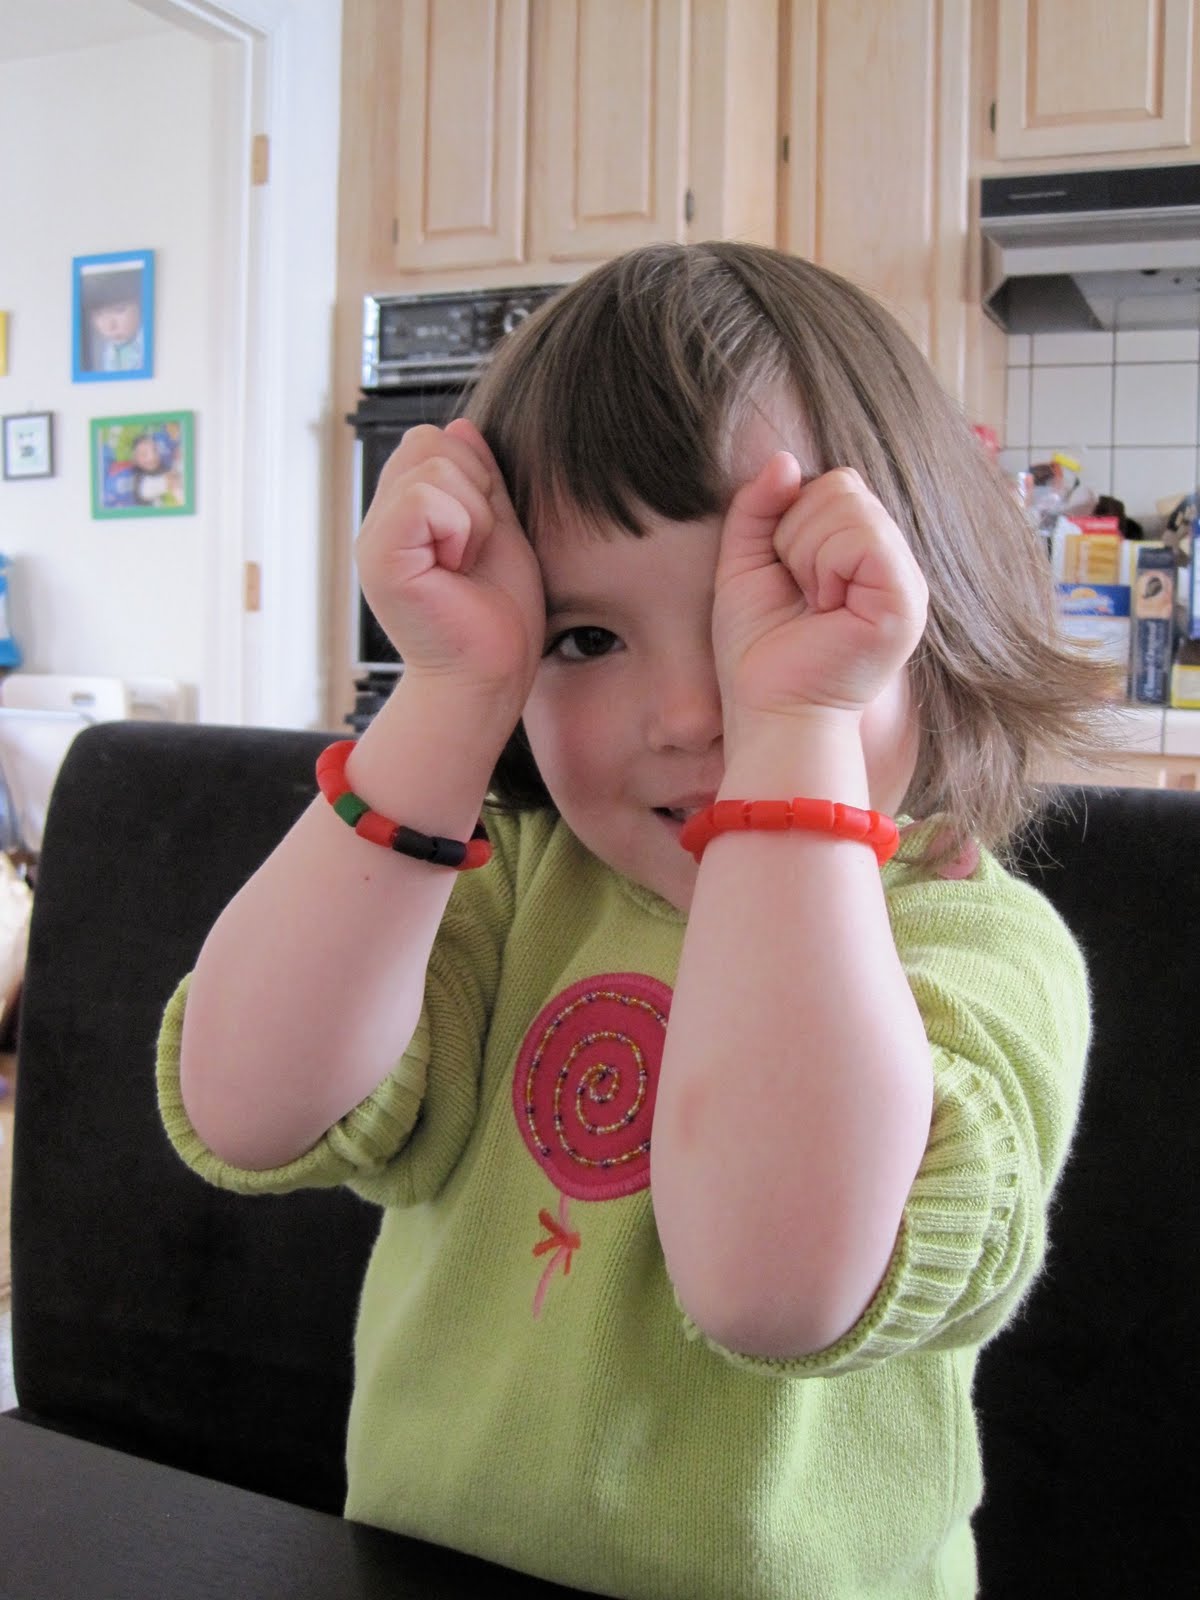
The Boy was very proud of his work and wore his bracelet all day long.


The Girl is showing off her double bracelet look.


Another sick day project accomplished!

P.S. In case you were wondering, the hands belong to both kids. There are two right hands in the picture and the one closer to the green bead belongs to the Boy.

Monday, June 14, 2010

A Rainbow to Brighten Our Days

Both kids have been sick for over a week now and we've been home bound the entire time. While we did a lot of napping, there were still lots of hours left. We haven't spent this much time at home since before the Girl started preschool. To entertain ourselves, we pulled out lots of crafts.

Here is the first of many craft related posts. We attempted the rainbow cupcake. I followed tutorials and watched this video. Our results were not nearly as pretty as the ones we saw on the internet but they were still exciting for the kids.

Rainbow batter:


How our cakes baked up. As you can see, they are more psychedelic than rainbow like.


I didn't use as much food coloring as some of the recipes suggested so the colour of my cakes were not as vibrant. I couldn't get the layers to lie flat either. The inside is just a huge explosion of colours.


This project was very time consuming and the result was only okay. I may try it one more time before I write it off completely. I will definitely make sky high icing for it next time.

Thursday, April 8, 2010

Birthday Week

I am behind on pictures and posts again because this was birthday week. Two out of the three goof-balls in the family had a birthday. So, I was busy planning parties. Yep, parties, more than one.

Look at this silly girl. This is how she came in to my room on the morning of her birthday.


So silly princess asked for a princess dress up party. However, the guest list she gave me consisted of one girl and two boys other than herself. I am pretty sure the boys are not going to prance around in dresses so I had to come up with something that all the kids can enjoy.

Nothing says dress up to me like capes. There were 8 kids including the siblings so the first thing I did was to sew eight of these. The girl ones have hoods and fur and the boy ones either have collars or hood with no fur.


I gathered all the play dresses in the house.


Then to complete the royalty look, I made some crown. Just to make it even more boy friendly, I decorated with cars and trains.


Finally, I set up a dressing station and put a whole bunch of other accessories like shoes and masks near it.


Hubby was drafted to handle the decorations. He was asked to make the room very pink.


A final princess touch.


And the silly girl was transformed into a princess who is ready to party!


To be continued...

Tuesday, February 16, 2010

Sewing Homework

The Girl borrowed a naked Barbie doll from a friend one day. Before she went to bed, she told me that it's not okay for the doll to be naked. Barbie needed a mermaid costume. Green tail, purple boobies (that's what she calls a bra) and a flower necklace. I was to work on that while she slept so she can play with Barbie in the morning.

So after I tucked her in, I set to work on my assignment. Can't believe I am sewing for Barbie now.


A close up of Barbie the mermaid. I discovered the trick to these play clothes is lots of elastic. The tail has an elastic waist band and the bra was sewn with elastic thread. The necklace is just a piece of confetti from Valentine's day strung on a short length of elastic thread.


Here is a bonus picture of Barbie and my newest girlie toy: a pink camera. Thanks for being manly enough to allow a pink camera in our household, Hubby.